
How to complete vendor details
The Vendor Details section is the initial step in onboarding as a new vendor on Felix. This section collects essential information about your business, including contact details of the primary account owner, details of directors (if applicable), and any branches your business operates.
Profile Details
In this section, you will be prompted to provide general information about your business, including your business' ABN, address, phone number, and website.
If you have previously completed an application for another organisation this section may already be prefilled. Review all details to ensure they are accurate and up to date.
To complete the Profile Details section:
- Update the following fields:
- Primary operating location of your Felix profile- Select where your location is from the dropdown.
- For Australian vendors, they need to perform the ABN verification:
- Lookup your ABN - Click the Search the ABR link to look for your business ABN.
- If the ABN entered is correct, the following fields will be added:
- Entity Name - This is prefilled.
- Choose your business name - Select the relevant business name from the dropdown. If you have a custom vendor profile name, select Add custom vendor profile name from the dropdown and you will be required to enter your custom vendor profile name in the field provided.

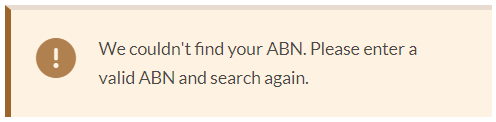
- If the ABN entered is incorrect, a message will show below the field that says:
- If the ABN entered is correct, the following fields will be added:
- Lookup your ABN - Click the Search the ABR link to look for your business ABN.
- For vendors outside Australia, update the following fields:
- Registered Business Name
- Legal Entity Name
- Business Number (BN)
- Answer the following question/s:
- Does your business also operate in Australia? - Select Yes or No. If you answered Yes, another question will be added.
- Is your business registered for tax in Australia? - Select Yes or No. If you answered Yes, enter your business' ABN.

- Is your business registered for tax in Australia? - Select Yes or No. If you answered Yes, enter your business' ABN.
- Does your business also operate in Australia? - Select Yes or No. If you answered Yes, another question will be added.
- For Australian vendors, they need to perform the ABN verification:
- Company Address - Enter your business' physical address in the field provided and select the appropriate location from the dropdown. Refer to this article on how to complete the address field.
- Main operating location within Australia - This will be required to be filled out by vendors outside Australia if their business operates in Australia and is registered for tax.
- Company Phone Number - Enter your business' main phone number in the field provided.
- (Optional) Website
- Primary operating location of your Felix profile- Select where your location is from the dropdown.
- Click the Next section button once you have completed filling out the necessary fields or click the Save button if you want to continue later on.
ABN verification for vendors outside Australia is not applicable. It only applies to Australian-based vendors.
Key Contact
In this section, you will be required to provide the contact details of the primary account owner. These details will be used by both organisations and Felix to communicate with you as a vendor.
To complete the Key Contact section:
- Update the following fields:
- Contact First Name
- Contact Last Name
- (Optional) Contact Job Title
- Contact Mobile
- (Optional) Contact Phone
- Contact Email - This is prefilled.
- Click the Next section button once you have completed filling out the necessary fields or click the Save button if you want to continue later on.

- If you want to update the details of the primary account owner, navigate to Settings > User Management from the main menu. Refer to What is a Key Contact for more information.
You will not be able to update the contact email from this section. The contact email is also your username and can be updated on the My Profile page of your account. You can learn more about updating your email address in our guide, How to change your email address.
Directors
In this section, you can input the details of the directors associated with your business.
The Directors section is subject to custom configuration by the organisation and may not be enabled for your application.
Branch Locations
In this section, you can provide information about the branches or offices operated by your business. Additionally, you have the option to specify the head office location within this section.
To add a branch location:
- Click the Add branch button.
- Update the following fields:
- Branch Name
- Branch Contact First Name
- Branch Contact Last Name
- Branch Email Address
- Country/Territory of Branch - Select the appropriate country/territory of the branch from the dropdown.
- Address - Enter the address of the branch in the field provided and select the appropriate location from the dropdown.
- Branch Phone Number
- (Optional) Click the Set as head office checkbox to indicate that the branch is the head office.
- Click the Add button.
- To add another branch, click the Add branch button.
- To edit or delete a branch you have listed, locate that specific branch and hover over the ellipsis icon where you can see the options Edit Branch or Delete Branch.
- Click the Complete Vendor Details button once you have completed filling out all the sections for Vendor Details or click the Save button if you want to continue later on.
